
MANUAL 5 OF 7
The app lets you track all your trips so you can enjoy them again later. Read this fifth guide to learn how to track and add photos to your tracklog.
Table of Contents
Tracking
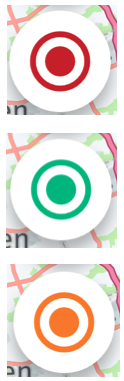
Click the track button to start tracking. The button will change from red to green, and "Recording" will appear in green at the top of the screen. This will always tell you whether you're tracking or not. When you pause the tracklog, the button will turn orange and the text at the top will change to orange, indicating "Paused."
Click the button again to display the various track options. ATTENTION! For the explanation in this manual, the image has been adjusted to show all buttons. In the app, you can swipe to reveal the delete and edit options.
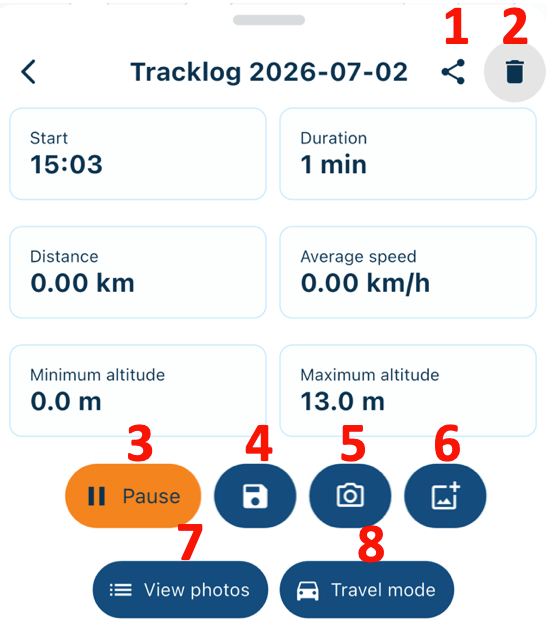
- Share: Click here to share your track while you are still on your way;
- Delete: Click here to delete the tracklog. ATTENTION! This is permanent;
- Pause: Pause/restart your tracklog here;
- Save: Click here to save the tracklog;
- Take a photo: Click here to take a photo and add it to your tracklog;
- Add a photo: Add a photo to your tracklog from your own photo gallery;
- View photos: If you've added photos to your tracklog, click here to view them;
- Travel mode: Change in which travel mode this tracklog is being tracked.
If you accidentally close the app while tracking, don't worry. You'll be asked if you want to discard the tracklog or resume it. Click Resume to pick up where you left off.
Adding Photos to the Tracklog
Permissions
When taking and adding photos to your track log, you'll receive two notifications asking for permission the first time:
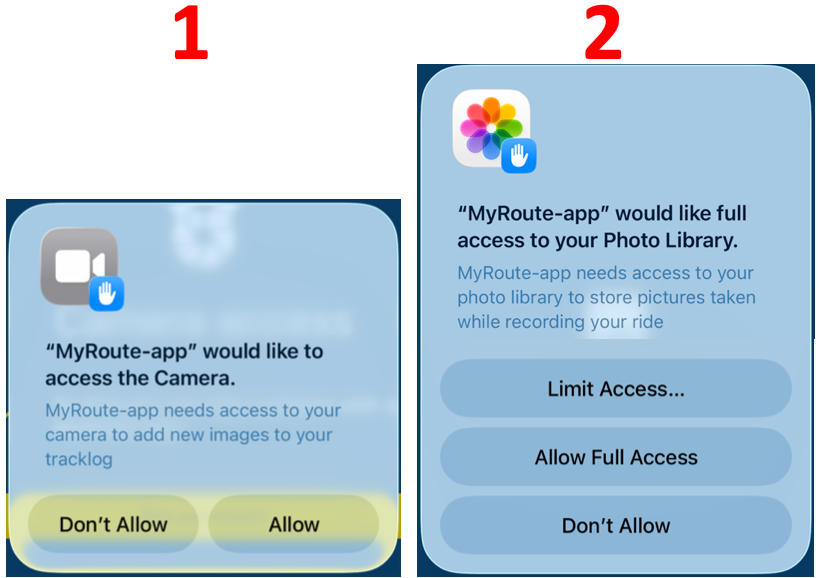
- Camera access: Required to take photos;
- Photo library access: Required to add photos from your gallery to the track log and to add photos you take in the app directly to your gallery.
Camera
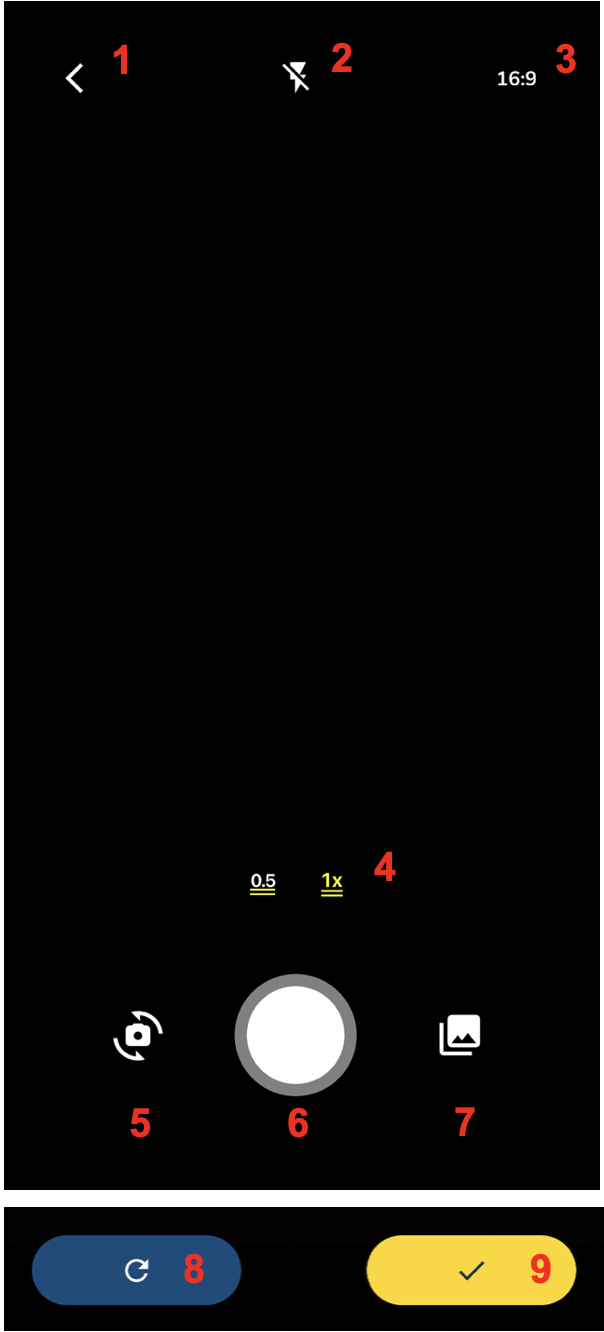
- Back: Close the camera;
- Flash: Choose whether the flash should be on, off, or automatic;
- Aspect Ratio: Choose the aspect ratio of your photo;
- Zoom: Choose the camera zoom level. Zoom options vary by phone;
- Rotate Camera: Switch between the front and rear cameras with this button;
- Take Photo: Click here to take the photo;
- Open Gallery: If you've taken a nice photo for the track outside the app, click here to add it;
- Retake: Click here to retake the photo;
- Add: If you're happy with the photo you've taken, click here to add it.
Edit an added photo
Under 'View photos' you can find all added photos. Click on them to view and edit them. Click the trash can to remove them directly from the list.
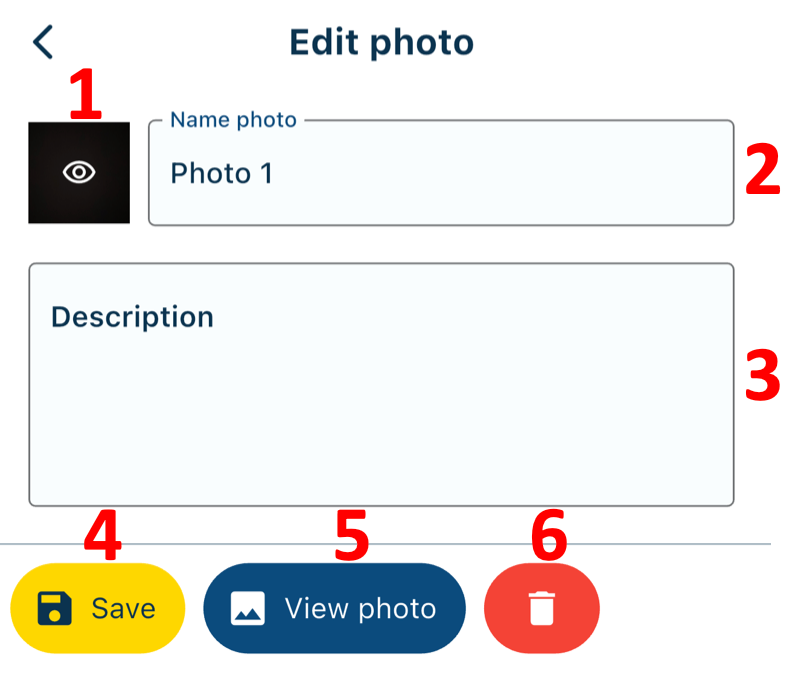
- Thumbnail: Here you'll see the added photo as a thumbnail; click on it to view it;
- Name: Give your photo a name if desired;
- Description: Give your photo a description if desired;
- Save: Click here to edit your changes;
- View photo: You can also click here to view the photo;
- Delete: Click here to delete the photo.
Share Tracklog
When you save a tracklog, you have the option to share it in a nice and and an attractive way. This allows you to share not only a link to the track, but also a customizable image. For example, you can add photos from your track or display its statistics.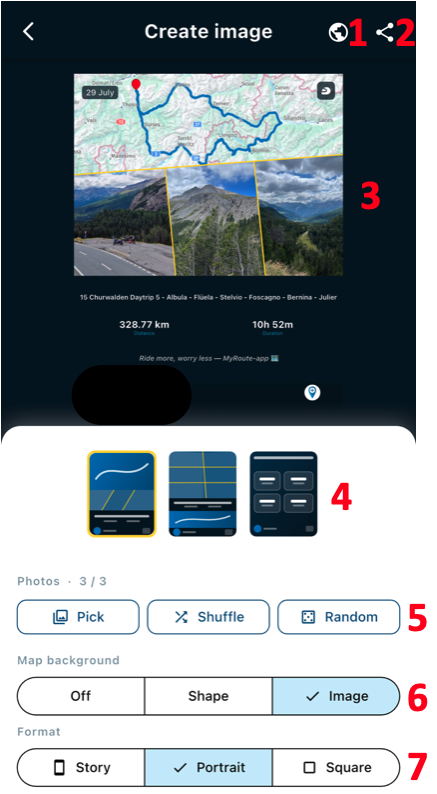
- Privacy: This button is shown when the tracklog is not public. If you want to share it with everyone, change the privacy setting to 'Public' here;
- Share: Click here to share the route in your preferred way once everything is ready;
- Image: This shows what your image currently looks like. You can zoom in, zoom out, and reposition the photos within the frames;
- Options: Choose how you want the image to look. If you have not added any photos, only the statistics option will be available;
- Photos: If you have added photos, you can select them here, either manually or randomly. Click Shuffle to change the order of the selected photos.
- If you have not added any photos, this option will not be shown at all.
- Map background: Choose whether you want to display the route and whether it should appear as an image or as a shape;
- Format: Adjust the image format here so it is suitable for the platform where you want to share it.
ATTENTION! This feature is only available for your own routes and tracklogs. If you want to share an existing route or tracklog in this way, do not use the Share button on the route or tracklog. Instead, choose Create image. This will open the same screen as the one shown above.
Click here and open a previous/next manual of the app
2. App - Basics